Cisco Solution
- Login to cisco controller
- Click on advanced tab

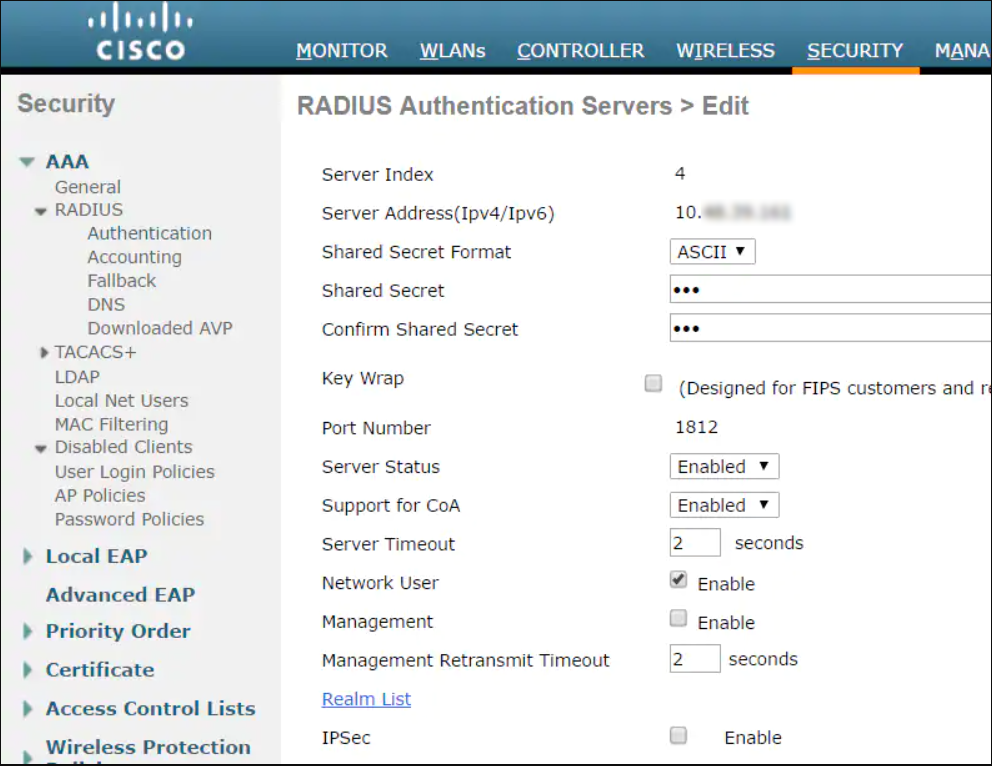
- Click on Security > AAA > RADIUS

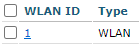
- Click on WLANs tab

- Select an SSID you would like to change from "WLAN ID"
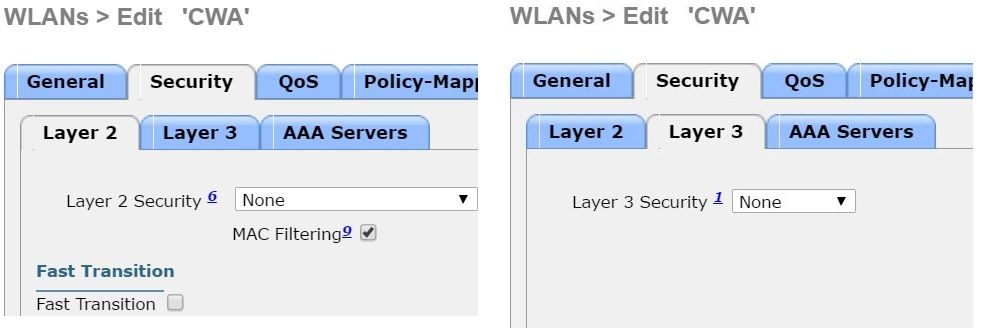
- Move to Security > Layer 2 & Layer 3, then change Layer Security to None
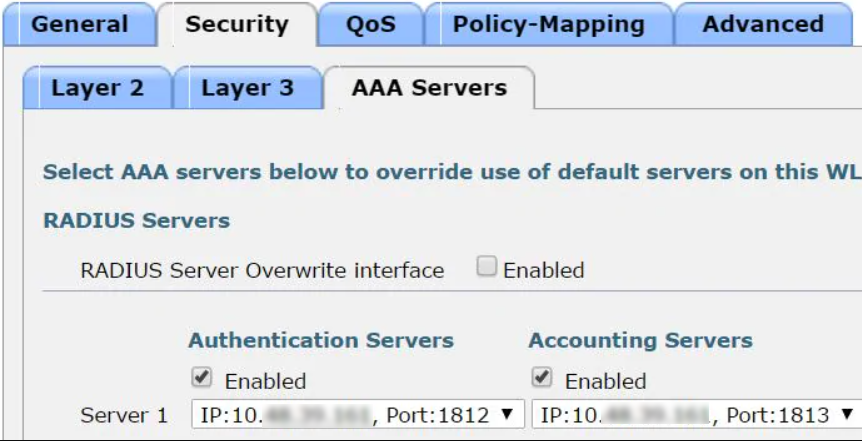
- Move to AAA Servers and set Server IP address
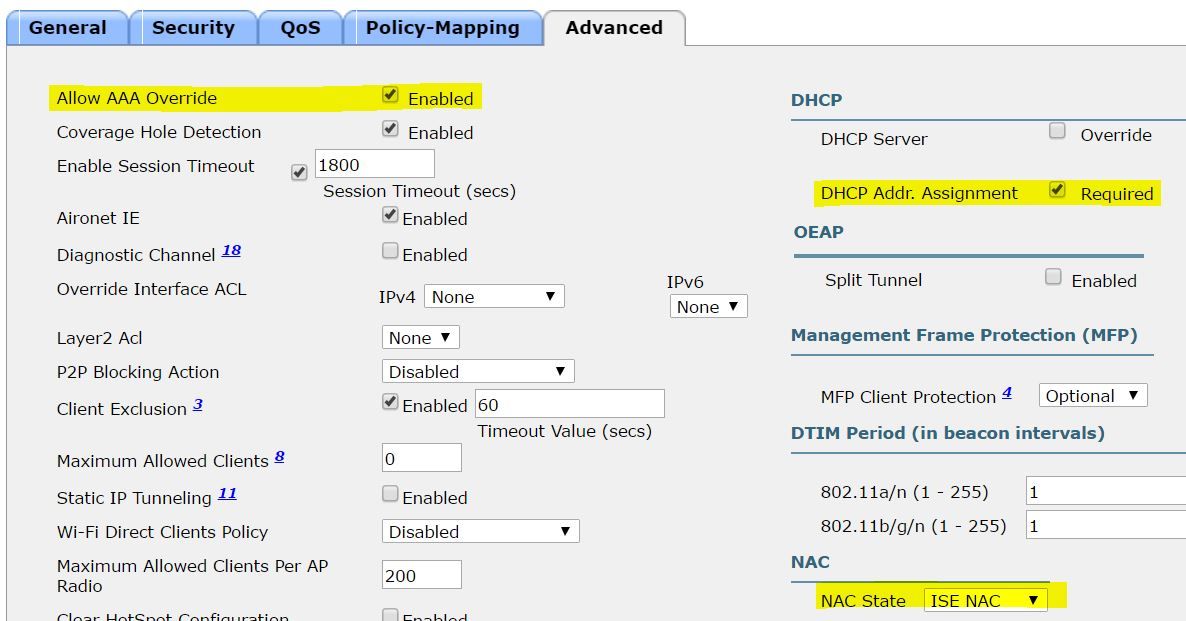
- Move to Advanced Tab and change highlighted selections
- Click on Security > AAA > Access Control Lists
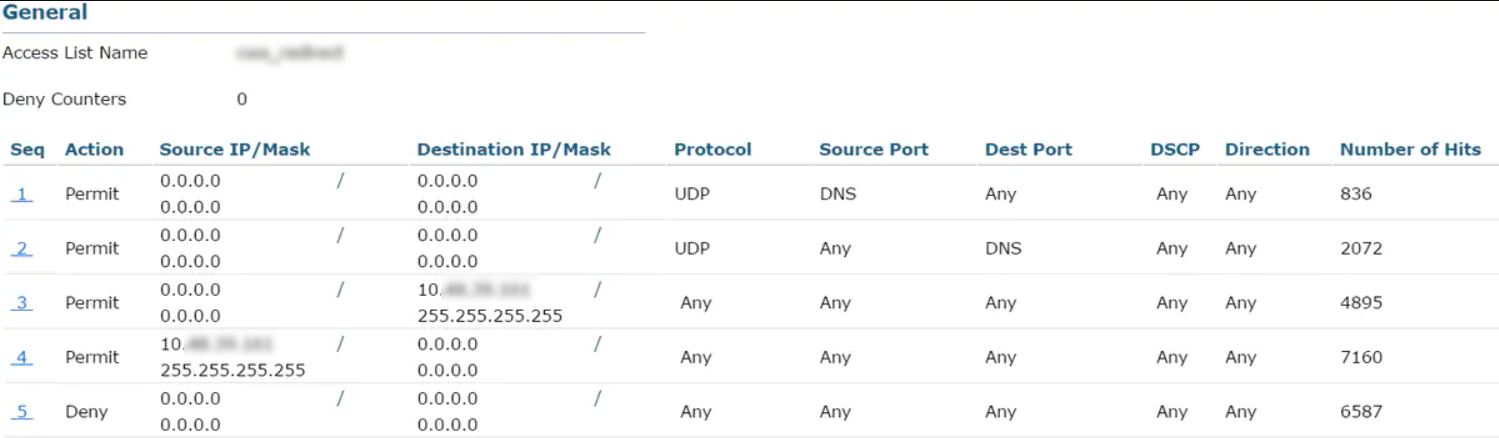
<Configure ACL to redirect traffic to accept Captive Portal> - Click “Apply”

- Click "Save Configuration" to save changes to WLC
