- Go to Control Panel
- Click Appearance and Personalization
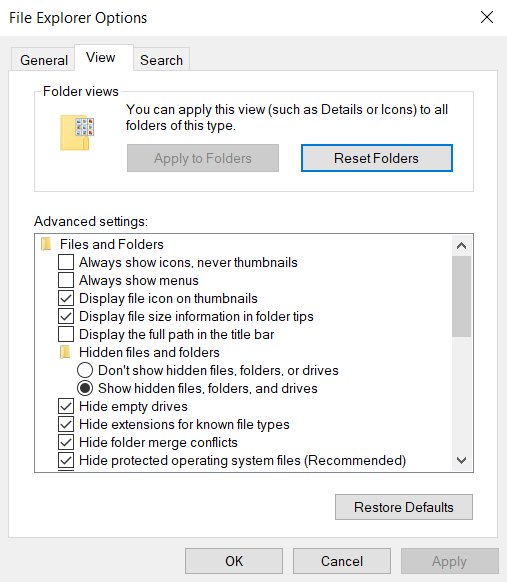
- Under File Explorer Options, click show hidden files and folders
- Under Advanced Settings, then Hidden files and folders, click show hidden files, folders and drives
- Now, click file explorer and go to your (C:) drive
- Click Program Data
- Navigate to AccessAgility folder
- Delete WiFi Scanner folder
- Type Add or Remove Programs in the search bar
- Find WiFi Scanner and Uninstall
- Now, you can have a clean install of the latest version
English