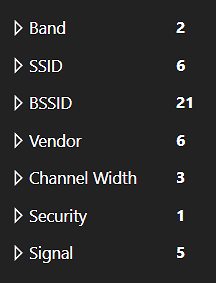
Filtering
WiFi Scanner allows you to easily locate wireless networks. For more advanced filtering of the WiFi Scanner, use the Filter Tree on the left-hand side of the application. By clicking on certain categories, you can filter by Band, SSID, BSSID, Vendor, Channel Width, Security, and Signal!
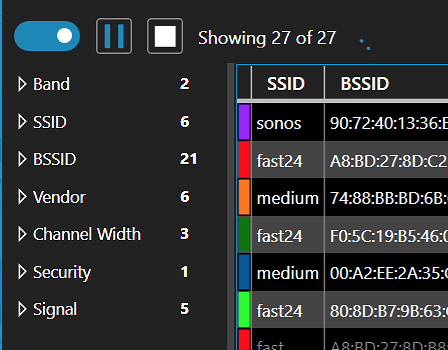
To hide the Filter Tree, you can click on the Toggle Switch located above the word “Band”. This will allow you to see just the SSID list.
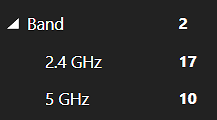
Each filter in the Filter Tree has a drop-down icon on the left-hand side. Click “Band” you can click either 2.4ghz or 5ghz to sort out the SSID list by either band option.
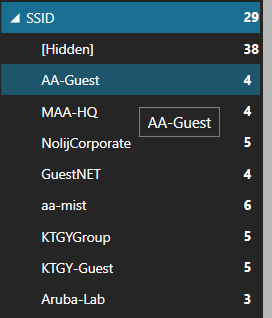
You can filter by SSID and check out the networks around you! Helps in searching what is located around you by adding other filters!
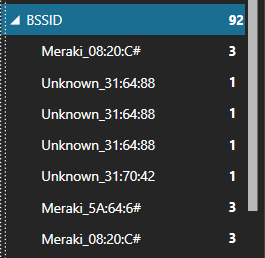
Filtering by BSSID can be very helpful and also notice below that it links the MAC to its correlated vendor brand!
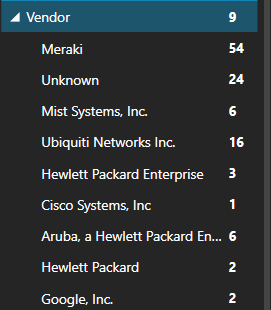
Filter by Vendor and see what other people are using around you!
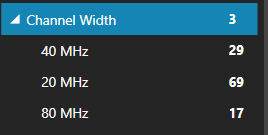
Channel Width is a very important factor in determining WiFi settings! Select the Channel Width you wish to view to better understand your options and the WiFi environment around you.
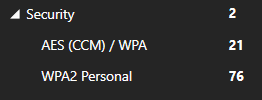
View who is using what security protocol around you!
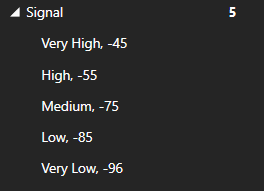
Filter by Signal Strength to see which SSIDs have the strongest signal to your device.
Navigation and Preferences
An important feature of this application is its ability to pause, stop, and start scanning for wireless data capture! Using these buttons below. Remember to save these sessions later for analyzing!


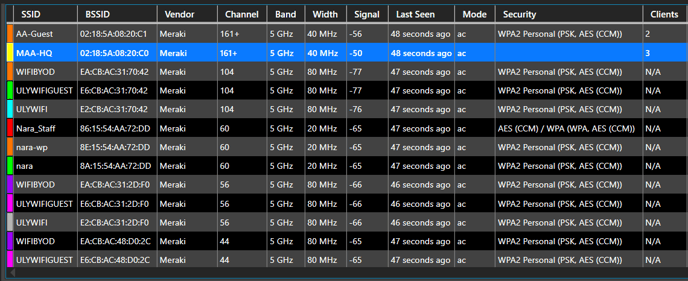
The table view in WiFi Scanner will show you more information about the networks around you.
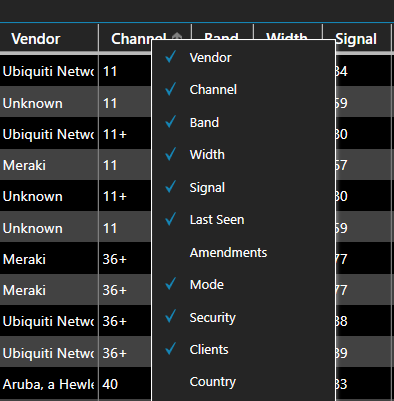
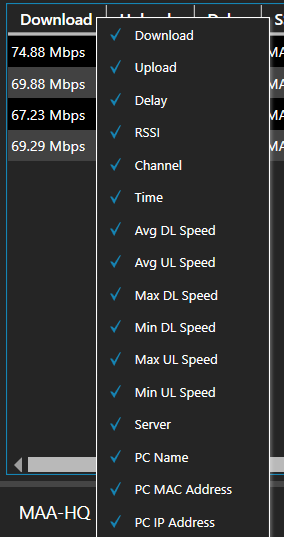
To add different column headers, right-click on the SSID column header and choose any from this list that you would like to include!
Once you have selected found an SSID you wish to view and explore more, locate the SSID details tab located here. See the vast amount of information and details that you can acquire from any network in your area!!!

( Note* these details pertaining to the SSID that you have selected in the SSID list. You can view these SSID details for your network or any outside network’s signal that can be picked up by WiFi Scanner! )
In the top left corner, you will see WiFi Scanner, under Preferences select Columns. This is another way you can add or remove column headers from the SSID list.
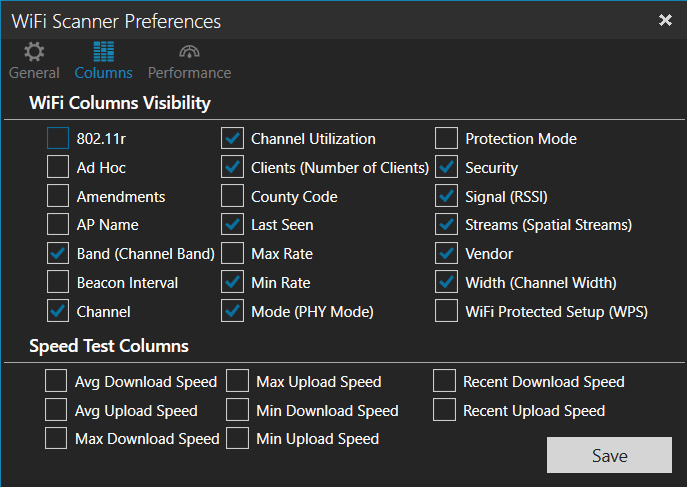
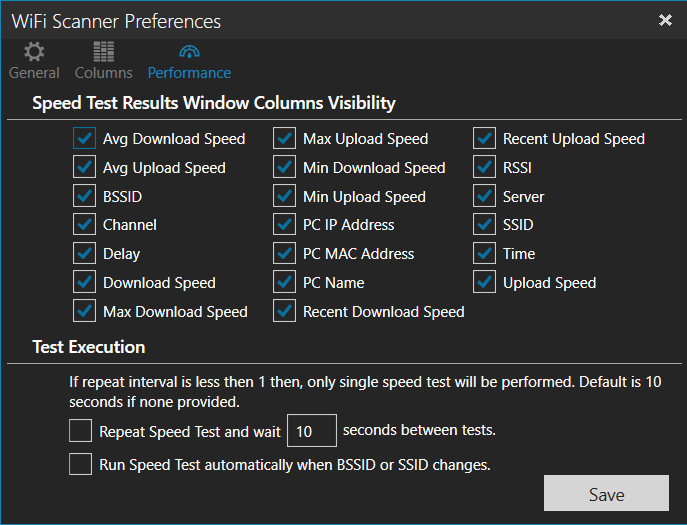
Notice the Speed Test Columns to the bottom of the picture? Those are for column headers in the Performance tab for the test results! By selecting those you can add metrics of what you want to see as a tested metric. This will of course give you valuable insight and information in regard to your wifi internet speed. Remember this for later!
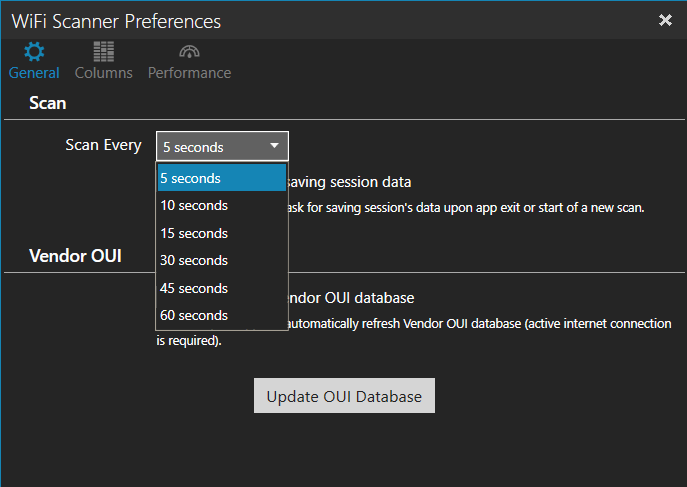
Under Preferences, you can adjust scanning duration by clicking the drop-down next to “Scan Every” and view the ranges from 5 to 60-second intervals.
You can also change columns that are visible in the Performance Tab within preferences. Enable automatic speed tests in the background and how often they will execute. This is important!
Set automatically update from vendor OUI database.

In the File tab “Open Session” always opens a previously saved session. “Save Session” to save your current session. “Export Scan Results as CSV” to export your data to an Excel CSV file.

Sorting the WiFi Scanner SSID list by ascending and descending specific columns alphabetically or from the highest to the lowest number. This is a nice feature when trying to organize results or compare various metrics based on other types of ranking you find interesting to see.


Drag and Drop columns to put them in your order preference!


In the “SSID Details” section, clicking on the “+” sign will create a drop-down that displays even more information pertaining to that piece of data from that details list.
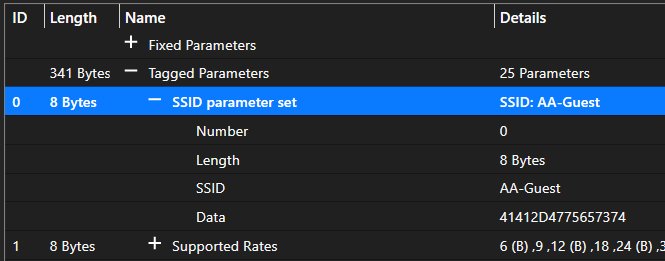
Using the SSID Parameter set is a quick way to see which SSID network you're on
Copy and paste all Columns for one SSID: Right-click over SSID row and select “copy all columns and header names,” and paste into another program or application.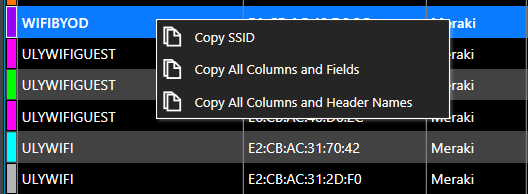
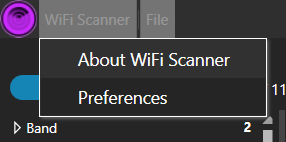
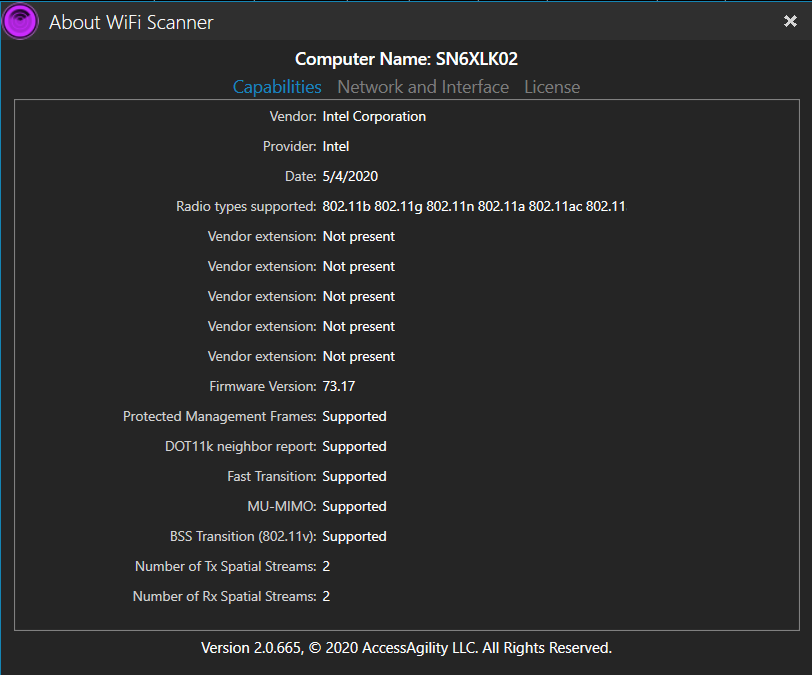
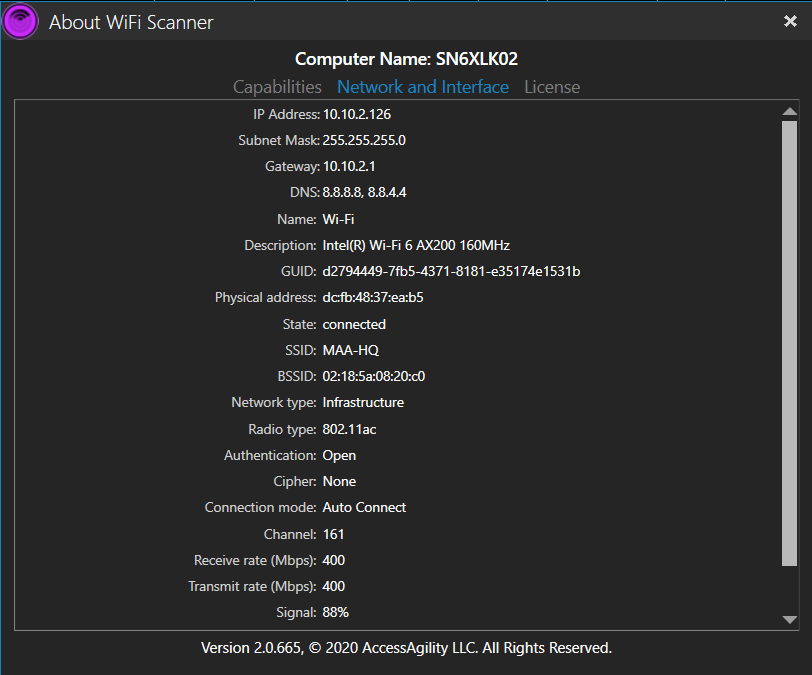
View Details about WiFi Scanner and your device by clicking “About WiFi Scanner” under WiFi Scanner
See your device capabilities, details supported tech and application version under the Capabilities tab in About WiFi Scanner.
See your machine's network and interface details in the Network and Interface tab.
Performance and Tests
Using WiFi Scanner, you can evaluate the allocation of wireless networks by channel and select the least congested bandwidth for the access point, allowing you to increase their connection speed significantly.
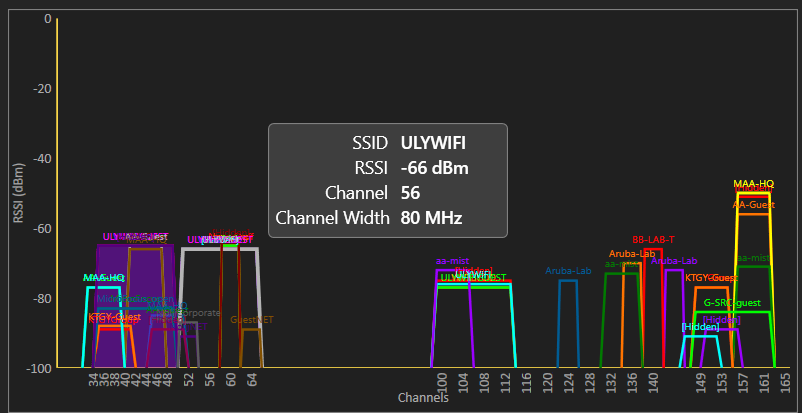
So, one of the best parts about using WiFi Scanner is its ability to give you a visual layout of all the networks and what channels they are using. You can correlate that data to the signal strength of each network in these Spectrum graphs. Check it out and see for yourself what SSID might be causing issues to your own network!!!
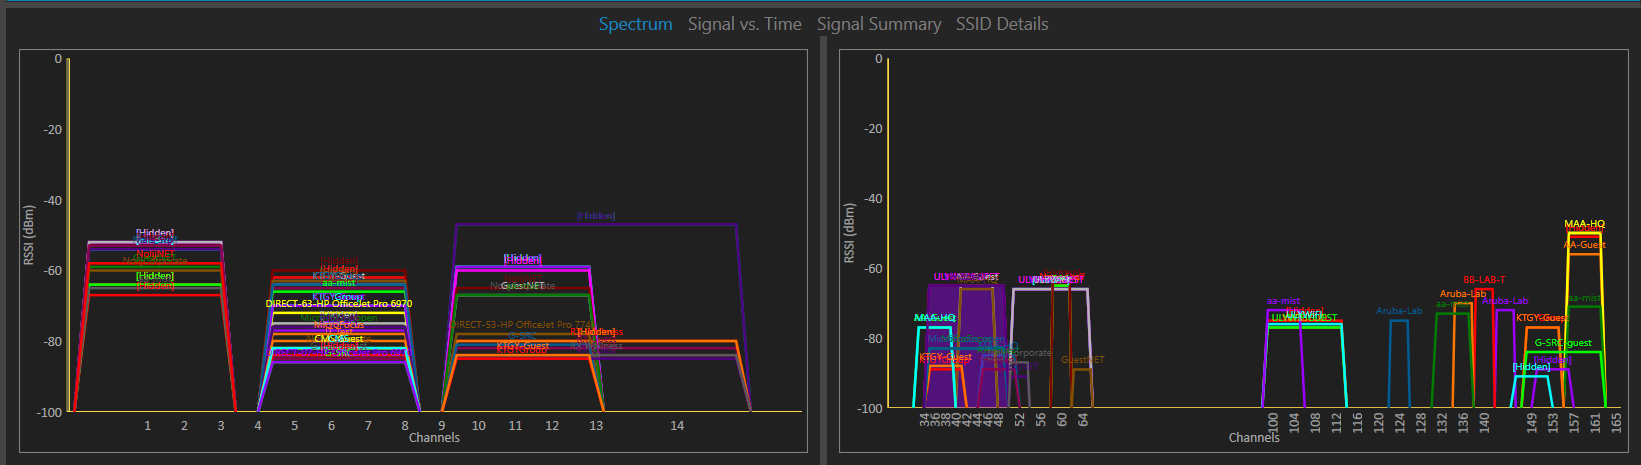
Hover the cursor over the SSID band to see its “Quick State” details
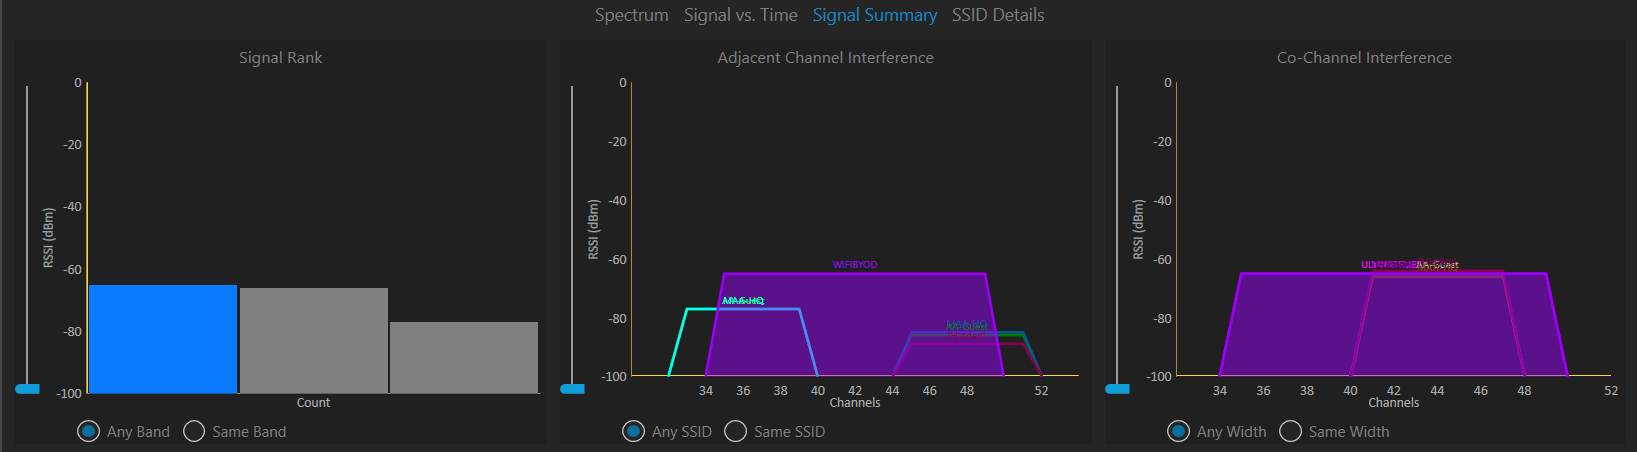
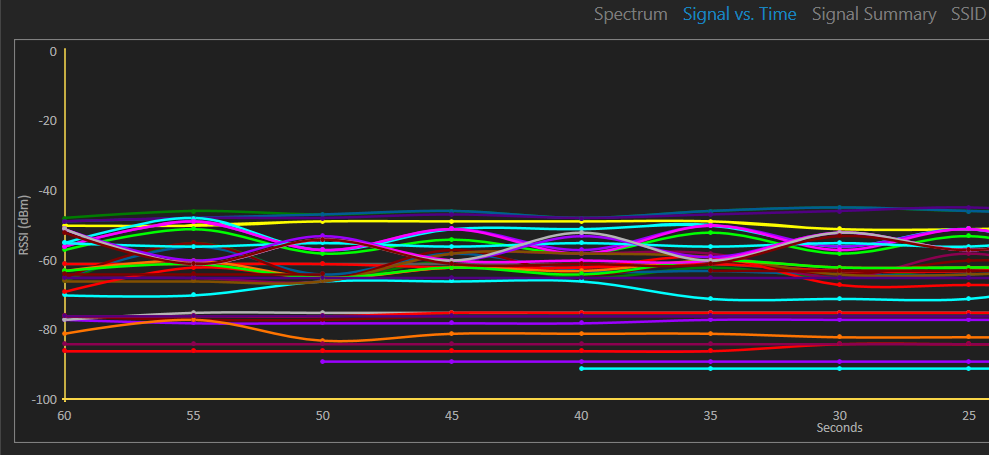
The Signal vs. Time graph shows how your network's RSSI signal strengths change as you move around the room or office. This is a picture of what all SSID signals in the area look like.
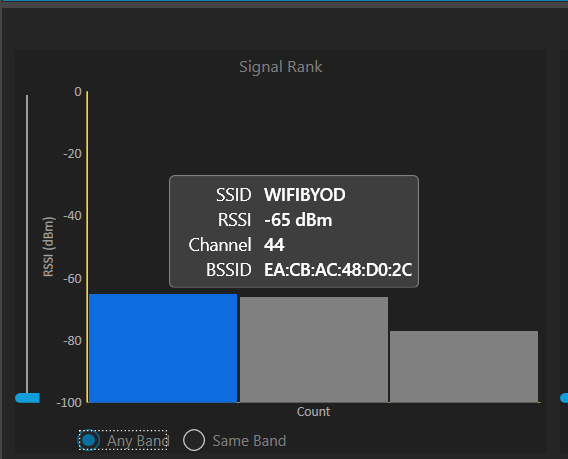
Signal Rank shows the strength of the WiFi signals from the network you are connected to. The yellow bar indication is your own device results that you are currently connected to.
Run network and performance tests under the Performance Tab!!
The Performance Tab will allow you to conduct various speed tests and view a list of performance data such as delay, download, and upload speeds on the network you are connected to as well as different servers. This is the complete list of various metrics you can pick and choose from. To view, right-click on the column header and choose which you want to see listed.
Running these performance tests is as easy as clicking start!!
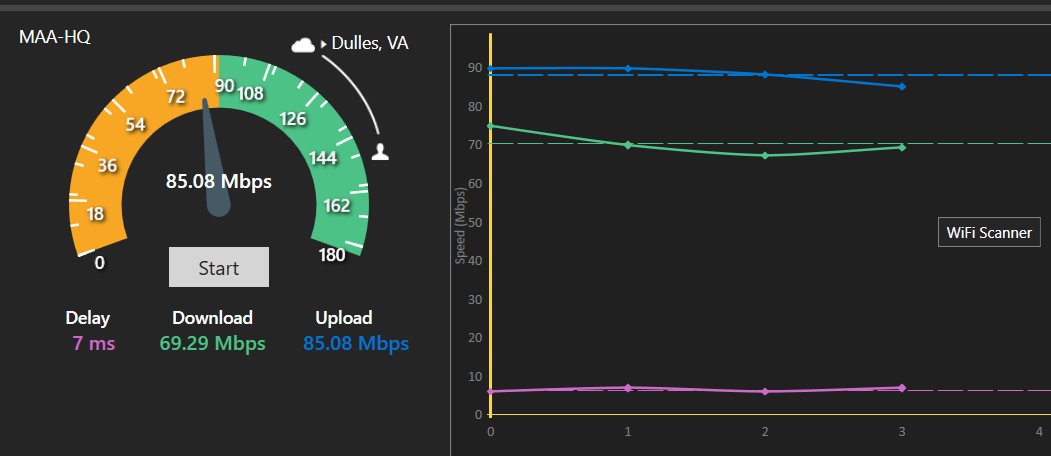
You can check and compare different server locations by clicking on the city next to the cloud icon. Run a test and compare the results!


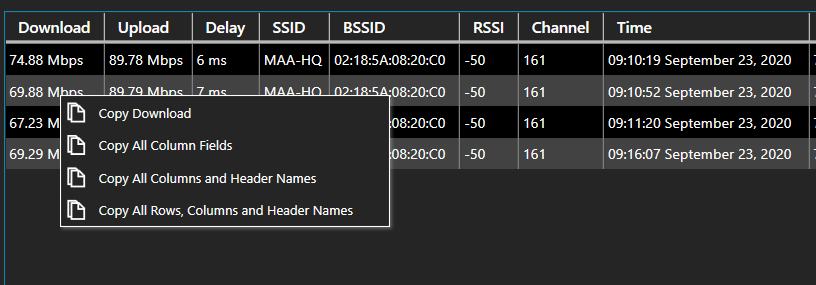
Any user can copy the results of the performance test. A user can copy the results by an individual header, by all column fields, by all columns and header names, or by rows, columns, and header names. You can also copy and paste the results of multiple tests to compare the results in an easy to see the layout for others to view.
WiFi Scanner is useful for normal access point users who need to find out the signal strength for their wireless network at home, or office. In addition, WiFi Scanner is an indispensable tool for corporate network administrators in performing tasks such as configuration, planning, and monitoring varouis parameters on business wireless networks.